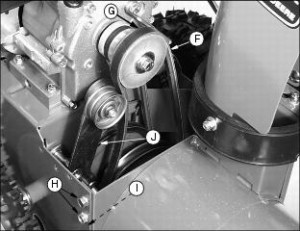
 Replacing Belts on Snowblowers is not something that operators really want to do very often. In fact the average residential owner should probably never have to replace any belts. This assumes that they are only clearing their own relatively short driveway. It also assumes that they do not engage the forward drive wheels when the wheels are blocked. The same thing applies to the auger as well. You risk burning the belt and breaking it as it heats up. If there is ice or snow blocking the auger, first shut the machine off. Then use a broom handle or a special snow clearing tool to remove the ice and snow from the auger. Never put your hands near the auger.
The auger could turn 90 degrees once the pressure is released. This would be sufficient to slice a finger or even a hand off. Back to replacing belts on Snowblowers.
Replacing Belts on Snowblowers
The first step is to check the condition of the belts. There is a plastic housing that covers the pulleys and belts. It is located between the engine and the chute of the snowblower. Remove two bolts that hold it in place and then remove the plastic housing.
You should see two belts, each on a different set of pulleys. Make sure the engine is turned off and cannot be started. Examine the condition of the belts. Look for fraying or splitting.
Check your manual for the correct belt size. Replace both if frayed. You might as well replace both even though one of them may appear to be fine.
Depending on the snow blower you may have to temporarily separate the engine from the blower housing. Access the belts by splitting the machine in the middle. Replace the belts and then reassemble the housing with the engine.
Start the engine. Is it assembled properly? You may have to adjust the tension to ensure it engages properly. Always turn the engine off before making any tension adjustments.
A small engine mechanic can complete the repairs. You may have to have it picked up and delivered for repairs to be completed. for more repair related posts, click here.


