 Many people ask the question, how to prepare my snowblower ready for winter season and what will it cost? Bottom line is that if you do nothing, one cold winter morning you may find that your snow blower will not start for you. With piles of snow in your driveway your left with clearing snow manually or asking a friend for help. It turns out that it is pretty easy to prepare your snow blower for the winter without incurring a large expense. Snow blowers are heavy and it is difficult to transport them to the repair shop unless you have a truck or a trailer of some kind. So doing basic maintenance can save you a great deal of money. Transportation, the mechanics charge and parts can add up to several hundred dollars pretty quickly. Basic maintenance can defer or eliminate this expense.
How to Prepare My Snowblower Ready for Winter Season
The basic list includes the following:
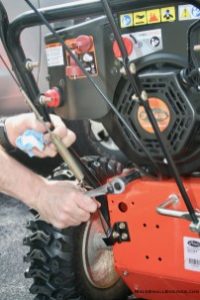
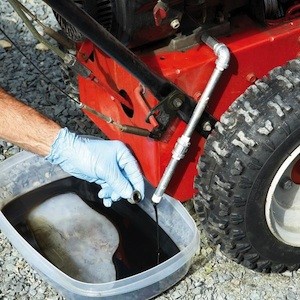
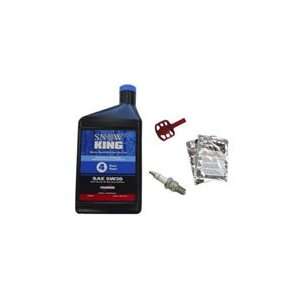
- Change the engine oil
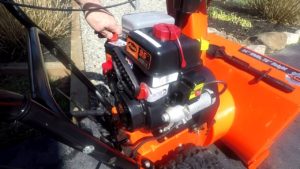
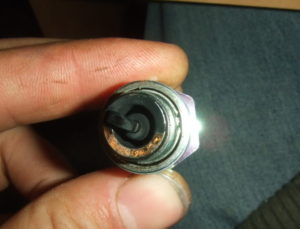
- Check and clean the spark plug
- Check the belts and belt tighteners to make sure there is no significant wear
- Verify the tire pressure and add air if needed
- Use fresh gasoline and use gas preservatives to prevent gumming
- Grease the augers
- Check the shear pins and replace if needed
- Listen to the engine, is it running smoothly
If you are really uncomfortable doing the above, then you will need to arrange for someone to perform this basic maintenance. Perhaps a neighbor is comfortable doing this work and would be willing to help you. Pay attention and learn how to do this maintenance yourself. It can save you a lot of frustration and cost. There is nothing worse than a failing snow blower on the heaviest snowfall day of the year!