Snow Blowers


Replace the Auger Drive Belt on the John Deere Snowblowers

January 21st, 2015 ernie Posted in Repairs & Mtce 2 Comments »

Auger Drive Belt on the John Deere Snowblowers
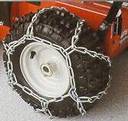
One of our readers left the following comment on one of our posts about Replace the Auger Drive Belt. We thought it was so valuable, that we decided to add it as a main posting on our blog. The picture on the left shows the cover removed as discussed in step 5. These instructions are available for those people that are handy with working on engines and machines. If this is not your thing, have a professional do the work for you. Above all, follow the appropriate safety instructions. Make sure the spark plug is disconnected so that the engine cannot start accidentally while being worked on.

Replace the Auger Drive Belt

Hard to find instructions: To replace the Auger Drive Belt on the John Deere Snowblowers (827E, 928E, 1028E, 1130SE, 1330SE, 1332PE), Contributed by terry_angers@hotmail.com

1. Lockout ignition so no accidental start (eg remove spark plug wire)
2. Ensure gas tank is closed tightly and fuel is turned off.
3. Raise unit into service position (onto face of auger) so you can remove the bottom plate. Bottom plate is held on with 4 bolts. It is not absolutely required to remove the plate, but it makes it easier to remove old and install new belt.

4. Return unit to normal position
5. Remove the plastic belt cover shroud (black plastic section between ejection Chute and the engine. This is held on with two bolts, one on each side
6. Lock Auger Drive engagement handle into ON position (easily down by using a squeeze clamp to hold it in place or tape / wire / other)

Careful Next Steps

7. Partially separate the main body of the snowblower from the auger housing to allow room to remove / install the belt. There are six bolts securing the two halves. ONLY REMOVE the top two bolts on each side. Then JUST LOOSEN slightly the bottom two bolts. The back half of the snowblower will tilt backwards; the auger housing forwards. You only need to let it tilt a small amount to be able to easily slide the new belt in place.
8. Once belt is around the lower large pulley, reattach the snowblower body securely with all six bolts before finalizing belt onto the small upper pulley.

9. If you have not forgotten to lock the auger drive handle down, it will not be hard to rotate the new belt with some pressure onto the upper pulley. Check that the belt is oriented around the idle pulley in the same manner as the traction belt.
10. The upper “belt guide” rod should be about 1/8” from the belt when the auger drive handle is down. Adjust position if needed by loosening mount bolt.
11. The amount of Deflection the new belt should have is a little more than ½” with moderate pressure.

Check Before you Reassemble

12. Check the Auger drive cable length adjustment to confirm it is not too tight or has excess slack.
13. Check Pulley alignment to ensure that the idler pulley is in alignment with the upper and lower pulleys. You may need to bend the pulley mount plate a very small amount in either direction to ensure alignment (there is not a direct adjustment) the plate can be pressured with two small lengths of wood (eg 1”x1” x 12”) when brace against the housing
14. Reinstall the Belt cover
15. Reinstall the bottom plate
16. Turn on fuel and enable ignition

17. Start the engine and test that the belts and auger are working properly

AddThis Social Bookmark Button

Quick Start Guide – Snow Blower

January 7th, 2015 ernie Posted in Repairs & Mtce No Comments »

Quick Start Guide - Snow BlowerWhen it is cold outside and you need to start your snow blower, the last thing you want to deal with is a hard to start engine. The Quick Start Guide – Snow Blower provides some pretty simple things that consumers can do to ensure that their snow blower will start easily every time, especially when you need to clear the driveway to get out to work. We put this simple list together and if there are additional items that we missed, let us know. We think that these are the main ones and not only will you be able to start your engine easily and also develop maximum power as well with a smoothly running engine. The following is our list of quick start guide – snow blower tips including some safety-related tips.

Quick Start Guide – Snow Blower

  • Always use fresh gasoline in your snow blower
  • Treat it with gasoline stabilizer to protect fuel systems
  • Change the oil after 50 hours of use and at the end of the season
  • Clean the spark plug, re-gap it every year and change it as needed
  • Start your snow blower once a month to circulate the oil and the fuel to keep stabilizer in the fuel system even in the summer time
  • Always make sure you read the instructions and follow the safety precautions before operating a snow blower and completing any maintenance..
  • They are noisy machines so wear hearing protection and safety glasses while operating these machines.
  • Wear boots with excellent traction to avoid slipping while operating a snowblower
  • Light snow is easier to deal with than heavy snow. You may want to clear your driveway several times to avoid dealing with lots of heavy snow

Clear Your Driveway

  • Make sure that your driveway is clear of rocks, twigs, and stones before using your snowblower for the first time
  • Point the chute away from people, objects, and buildings. A piece of ice ejected at high speed can really hurt and also break windows etc.
  • Always shut the engine off before doing any work on the machine including clearing snow away from the auger and the impeller, you can lose an arm very easily by accident.
  • Clear all snow away from the impeller and the blades when you are finished to avoid it freezing in place, after first shutting the engine off.

Many people would just prefer to hire a snow clearing company to get rid of the snow. Although it is an extra expense, having someone else do this work means you do not have to store the snow blower and maintain it. From an economic perspective, owning your own snow blower and doing your own maintenance is far cheaper than hiring someone to do the work for you. But if you need to pay hundreds of dollars for maintenance, or purchase a new snow blower every couple of years because you did not look after it, then hiring someone to clear the snow for you is the best way to proceed.

AddThis Social Bookmark Button

Snow Blower Repair

June 21st, 2012 ernie Posted in Repairs & Mtce 1 Comment »

Snow Blower RepairThere never is any good time to get your snowblower repaired, but doing in the offseason is a lot better than waiting until the snow is blowing. In the summertime, most people are thinking about the beach. They are not thinking about repairing equipment. Yet this is the best time of the year to do all repairs simply because of the temperature. In addition, because mechanics are looking for work if they are not working on lawnmowers and other garden equipment. I personally have had made Snow Blower Repair in the cold of winter and it is not fun.

Snow Blower Repair

If for no other reason, you will have your snow blower in line for repairs before everyone else even thinks about it later in the fall.  As snow blowers age there all sorts of little problems that begin to manifest themselves. They need to repair work completed. It is not easy to take these machines to the mechanic. They are heavy and bulky. You really need a trailer or a truck to put them in to transport them from your home to the mechanic. If you can fix it yourself and do the maintenance you are ahead of the game.

Most people will take it to the neighborhood small engine mechanic. However, some will try their hand at doing their own repairs to save both money and time. Follow instructions regarding safety conditions covered in the manual.

I once had a chronic flat tire. This tire would hold air for about 3 days and then gradually go flat on me. I am not sure if it was a nail or just old age. it was a tubeless tire and I obviously needed to get it fixed. The snowblower was about 15 years old at the time. Of course, the rim was rusted onto the axle so there was no way it was going to come off. I really did not want to rent a trailer to load my snowblower on, in order to take it to the mechanic. I was pretty frustrated with this particular repair.

Well, I ended up going to the mechanic. I asked him what the easiest way was to get the tire off so that it could be repaired. Of course, the experts always know the easy ways. They can fix these problems in a moment. His answer was so simple and straightforward, that I could not believe my ears.

Read the rest of this entry »

AddThis Social Bookmark Button

Trouble Shooting Snowblower Starter Problems

March 21st, 2012 ernie Posted in Repairs & Mtce 1 Comment »

It is always a good idea to keep your snowblower tuned up and ready to go for the Snow Blower Starter Problemswinter, but sometimes they just will not start and you need to know what to do before calling for expensive repairs. There are 4 or 5 steps to take with Snowblower Starter Problems before you raise the flag so to speak and call in someone to help. Of course, if you are handy then you can take it a lot further. But for now, we will settle for these simple steps to get your snowblower started.

  • Check the Choke and Throttle
  • Make sure there is Gasoline in the Tank
  • Clean Your Spark Plugs
  • Clean the Carburetor
  • Change or Clean the Air and Fuel filters
  • Call a Mechanic or a Good Friend

Trouble Shooting Snowblower Starter Problems

Check the Choke and Throttle

Most older snowblowers require the throttle to be on full and the choke also on, if you are starting the engine from a cold start. If the engine is already warm, you may not need the choke on at all.  If you are having trouble starting your snowblower always check these items first. Newer snow blowers may have an automatic choke and all you need to do is pull the starter cord or press the starter if you have an electric starter.  Follow the instructions for starting in various conditions if you are having trouble starting. Make sure you have gas in the gas tank and that the switch is actually turned on.

Make sure there is Gasoline in the Tank

You would be surprised at how many people forget to make sure that there is gasoline in the tank. If you are still having problems getting it started make sure there is fuel in the gas tank and that the valve under the tank is open to allow fuel to flow to the engine.

When you finish the winter season, all of the gasoline should be drained out of the fuel tank, and then the engine run until the gasoline in the system is burned off. This prevents the additives in the fuel from gumming up the choke and the carburetor. Many people do not do this and end up with carburetor problems. Always put clean fuel in your tank.

Clean Your Spark Plugs

As the engine gets older, the spark plugs will get dirty and corroded. This sometimes prevents the spark from occurring which means your engine is not going to start. Check the spark plug, clean off the plug, and re gap the plug.

Clean the Carburetor

If you have left old gas in the fuel tank you may end up having to clean the carburetor. This is relatively easy. However if you are unfamiliar with this step or do not have adequate instructions in your manual you may want to move to the next step first, just in case.  Carburetor rebuild kits are inexpensive and relatively easy to install. Follow the instructions in your manual for proper adjustment.

Change or Clean the Air and Fuel filters

The last step is to make sure that the air cleaner is clean. That lots of air is getting into the carburetor of the engine on your snowblower. The fuel filter if your snowblower has one, should also be clean. It should not be blocking the fuel from getting to the carburetor.

Call a Mechanic or a Good Friend

If none of these steps work, then you have to call a good friend who is handy with engines or you need to take your snow blower to a mechanic for a tune-up. Waiting until the fall to do this is going to mean that you have to get in line with everyone else who has the same problems. Summertime snowblower tuneups are a great time to get this little task done. And don’t forget to have the oil changed every year as well to ensure that your engine runs smooth and clean.

AddThis Social Bookmark Button

Snow Blower Tire Repairs

January 10th, 2010 ernie Posted in Repairs & Mtce 3 Comments »

Snow Blower Tire RepairsSnow blower tire repairs? It is mid July, 80 degrees F and your neighbor is running his snow blower. Your wondering what could be possibly going through his mind. Well he has decided to complete his annual maintenance and perform any snow blower repairs that are required. Summer time is in fact the best time to make sure your snow blower is tuned up and ready to go for the up coming season. It is nice and warm and working outside on something like a snow blower is easy and comfortable to do.

This post is about tire repairs to snow blowers, however before we get there a few words about maintenance. You should be completing the annual maintenance at the same time. Oil changes and lubricating the  auger and impeller, checking the belts and making sure that the tires have sufficient air in them are just a few of the maintenance items to be checked.

Home mechanics should also check the spark plug. Replace it if necessary or clean it up and re-gap it to make sure that it is ready to go at maximum operating efficiency. Finally clean the carburetor bowel and replace any gaskets that are needed. Check your snow blowers maintenance manual for a full set of steps regarding annual maintenance.

During these checkups you may encounter more serious repairs that may be needed. Perhaps you observed something that just was not working right for you during the previous season. Now is the time to get these items repaired and your snow blower ready for the season. We have focused on a  common one that may occur as your snow blower gets older.

Snow Blower Tire Repairs – Flat Tires

It is quite common for tires to go flat. Most tires these days are tubeless so you may have to remove the tire and rim and have your tire repaired if you picked up a nail. Most tire repair companies will fix your snow blower tire for a nominal fee. They will pull out the nail, place a plug in the hole, reseal the tire to the rim and blow up the tire to its proper pressure.

Older machines may be more difficult to repair. The tire rim may be rusted onto the axle making it very difficult to remove. This was the situation that I was faced with. No matter what I did I could not get that tire rim off. I thought that I was going to have to take the entire snow blower into a small engine mechanic just to fix the tire.

Before I went to that extreme, I decided to make a visit to our local small engine mechanic to see what suggestions he could make. I have purchased other parts from him and he was more than happy to help me out. He knew I would be purchasing more parts from him in the future. He had an answer for me I would not have thought of.

His answer to removing rusted tire rims was that he would normally apply heat using a propane torch and knock the rim with a hammer to get it moving. I did not really want to pursue this approach and told him so. I said I will bring the snow blower into him to repair. At that point he said there was another simpler solution and less costly to boot.

Convert from Tubeless to a Tube Tire

Basically you remove the rubber tire from the rim. You can do this using several screw drivers and gradually working around the rim until you have one side of the rubber tires side wall over the outside edge of the tire rim. At this point you want to make sure there are no nails or other sharp objects inside the tire. You can totally remove the tire if you want , however it is sufficient to only remove one side. Next remove the tubeless valve from the rim using a pair of pliers.

Once you have checked the tire thoroughly for nails and sharp objects inside the rubber snow blower tire before you place a new snow blower tube inside the tire. You can buy these for $15 or $ 20 , which I did from my friend the small engine mechanic. Place the tube inside the tire and line up the valve stem with the hole in the rim were the tubeless valve originally was.

Carefully Blow Up the Tube

The next step is tricky, however if you take your time and are careful, you will have no problem. Gradually work the tires sidewall back over the steel rim. Take care not to damage the new tube you have just placed inside the snow blower tire. Once you have the sidewall back over the rim, you need to again check that the valve stem is properly lined up. Make sure it is inserted into the hole in the rim of the tire. Lastly check that there are no twists or kinks in the tube.  This is a bit difficult to do since you will have to do this by feeling with the ends of your fingers.

Insert the valve stem properly and that there are no kinks in the tube. Slowly blow up the tube with a small tire pump. You want to add air slowly so any last minute adjustments can be made. They can be done before you damage the new tube you just installed.

As the tire fills with air, the tire side walls will slip on to the outside edges of the steel rim on both sides. You can then pump the tire up to the recommended tire pressure for the tire you are repairing.

For a total cost of $5 to $20, you have been able to repair a flat tire on your snow blower without removing the tire from the snow blower or taking the entire snow blower into a mechanic. What a simple and inexpensive solution to what could have been a difficult and expensive problem!!

For more details about repairs and maintenance you can do yourself, click here.

Save

AddThis Social Bookmark Button


?>


Web Content Development